| Line 118: | Line 118: | ||
'''''Cybran''''' |
'''''Cybran''''' |
||
| − | Start massing Monkeylords and Soul Rippers. Scathis is useless since unlike in skirmish it only has the range of a T3 heavy artillery. Get an sACU to start building some SAMs further out the water, then only get two naval factories and quickly upgrade them to T3. Try not to build too far out or you'll attract the petrols. Have two battleships ready to destroy those patrols and future naval assaults. |
+ | Start massing Monkeylords and Soul Rippers. Scathis is useless since unlike in skirmish it only has the range of a T3 heavy artillery. Get an sACU to start building some SAMs further out the water, then only get two naval factories and quickly upgrade them to T3. Try not to build too far out or you'll attract the petrols. Have two battleships ready to destroy those patrols and future naval assaults. Get a Plan B ready and destroy those subs from afar to complete the obj (make sure not to get too close since Plan B is rather weak). |
| − | + | Make sure you've bombarded the Aeon bases beyond recognition before transporting your cloaked sACU. Unlike UEF, you need to be more careful since the enemy sACU, if still alive, has omni radar, thus if possible try to capture the engineer that isn't nearby the sACU, or you can bring two sACUs and use one to attract fire while the other perform the capture. After you done, transport the engineer and sACU back. Get Aeon Quantom Gate and get some Aeon sACUs. Build a Tempest to help with the naval defense. Also get Collosuses and CZARs, you want the collosuses to tank damage while your monkeylords wreck havoc, and CZAR is used for their 15k air crash ability as well as their speed since Soul Rippers are quite slow. |
|
| − | Make sure you have at least 3 Monkeylords, 6 Collosuses, 3 CZARs, |
+ | Make sure you have at least 3 Monkeylords, 6 Collosuses, 3 CZARs, a Tempest and 4 Soul Rippers before proceed to the next stage. |
'''''Aeon''''' |
'''''Aeon''''' |
||
Revision as of 04:43, 8 January 2013
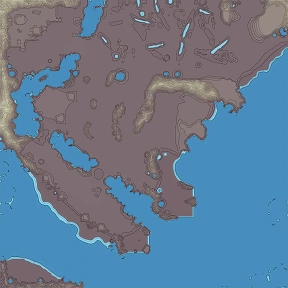
| X1CA_001 Forged Alliance official campaign map | |
| Size | 20x20 km |
| Fort Clarke, located on the planet Griffin IV, is the UEF's last stronghold. Seraphim and Order forces are attacking the fort with overwhelming force. If Fort Clarke falls, the UEF is finished. You will defeat the enemy commanders on Griffin IV and end the siege of Fort Clarke. | |
| Next map: X1CA_002 | |
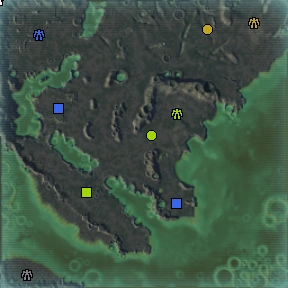
X1CA_001 is an official campaign map from Forged Alliance. It is the first map.
Summary
OPERATION:BLACKDAY
PRIMARY MISSIONS:
- Destroy the Order Bases
- Destroy the Order Assault Bases
- Defend the Civilians at Seabring(50% must survive or you will fail.)
- Defeat Order Commander Gari
- Defeat the Seraphim Commander
- Destroy Enemy Experimentals
- Protect Fort Clarke(Building must survive or you will fail.)
SECONDARY MISSIONS:
- Repair the Shield Generator
- Secure the Channel
- Clear Artillery Positions
- Save Civilian Outpost (UEF)
- Evacuate Civilian Outpost (UEF)
NOTE: The following guide deals only with main objectives.
Strategy/Walkthough
Be aware that the costs of units (primarily experimentals) differs between skirmish and campaign modes. A strategy that you have developed in skirmish may need to be modified during campaign. A few examples of these cost differences are:
Cybran Soulripper: (Skirmish: 40k mass, Campaign: 20k mass)(campaign has 30k fewer HP, too)
Cybran Monkeybot: (Skirmish: 16k mass, Campaign: 24k mass)
Cybran T3 Loyalist: (Skirmish: 3100 hp, Campaign: 3000 hp)
Aeon Galactic colossus: (Skirmish: 23k mass, Campaign: 32k mass)
Aeon Czar: (Skirmish: 48k mass, Campaign: 18k mass)
Stage One:
HQ explains that there are two Order bases northwest of your position, guarded by two artillery installations. He starts to say something about updating your objectives after destroying the bases, but is rudely cut of by a large amount of Spectres gunships that attack the base, primarily the quantum gate. There is no actual risk, however, and you may take as much time as desired to choose your faction. Upon doing so, the quantum gate is destroyed by the spectres, which self-destruct for no apparent reason. What you are left with is the ruins of a UEF base, with some low level AA, a few tech 3 generators and mass fabricators, and a tech 3 shield generator, in addition to scattered tech 3 mass extractors.
The first order of business should be to get a factory up and running (land or air), and to start producing engineers. Since your starting economy is fairly strong it is a good idea to move your ACU into the area protected by the shield and begin the tech 2 engineering suite upgrade (which is quicker than upgrading a factory, then producing tech 2 engineers). Meanwhile, begin churning out engineers from your factory, and begin construction of additional factories and AA defenses, as your position will be continually harassed by enemy air units, particularly gunships. Once you've upgraded your ACU, or obtained some tech 2 engineers, it is important to build some more shield generators, and some tech 2 AA, as your economy buildings will be repeatedly attacked by bombers and gunships. Your now obsolete tech 1 engineers can be assigned to assist tech 2 capable units, surround your mass extractors with mass storage (increasing their income from +18 to +27), assist/repair the starting shield generator, or whatever you deem necessary. Failing that, you may wish to simply detonate them, as the campaign's low unit cap of 500 will eventually become a hinderance. If you are Aeon, then simply sacrifice the engineers. Assigning some interceptors{ and later air-superiority fighters} to patrol your perimeter can take a lot of pressure off your shields.
Now that your base is sufficiently defended, you can tech up in any way you see fit. More tech 3 shield generators and some SAM installations are highly recommended. One usefull base building idea is to not build too close to the northern shoreline. If the attacking gunships have to come over land to attack your base, they will crash where they can be reclaimed. Crashes in water are lost to reclamation.
Now it is time to start destroying the Order's artillery and forward positions. If you're UEF, you can defeat the artilleries by building two cruisers and using their missiles to destroy the arty at maximum range, otherwise you can wait till T3 and use strategic bombers. You get 6 UEF T1 submarines patroling the shore at the start, thus you can simply use them to destroy the submarines early on.
Because the Order bases and artillery are just outside of tactical missile structure range, and strategic missile structures are overkill (on the other hand, having a few nukes might help later in this level), a mobile unit attack must be used. In general, a land assault on the beach will result in heavy losses, and little ground gained. In numbers, gunships can be effective at taking out the enemy artillery and point defenses, but the Order has a fairly strong AA presence in the area. One way of avoiding the enemy's defenses is to ferry some engineers (or sACUs), along with some mobile shields and AA over to the left side of the bases. You can then construct a small fire base, to create assault units, or bombard with artillery (if possible, use a few SACU's to capture a few factories, unless you are already have Aeon tech, in which case destroy them and reclaim them for the mass to make experimentals). If using this approach, it is recommended to first destroy the left artillery installation. Alternatively, you can simply ferry assault units along the same route, and hit the order bases all at once.
If you don't care about capturing Aeon tech and prefer a simpler approach, simply build some land/air experimentals and crush the bases, or if you're aiming for zero casualties (that said, it is unlikely to have your experimantals dying at this stage), simply build a couple of T3 heavy artilleries and sit back.
Prior to finishing off the enemy bases, load up a transport or two with engineers (or sACUs), and some mobile shields and AA, in preparation for the next stage.
Stage Two:
Once you've destroyed the forward positions, you'll be tasked with defending a small town from Order units. While the town has some moderate defenses, they won't hold for long. This is where those loaded transports come in. As quickly as possible, drop your units off at the town, and begin construction of defenses. The enemy will bring forth some pretty strong units, like tech 3 assault bots and artillery, so be sure to get plenty of shields up (watch your energy consumption, too). Plenty of tech 2 point defense and AA will hold off the majority of enemies, but a handful of artillery installations may be necessary for dealing with particularly tough or long-ranged units. As Cybran, it is essential to have some sACUs with you, as they can rebuild any structure, including fully upgraded shield generators, obviating the need to upgrade them in combat. Several SAM sites may also be required to deal with the numerous enemy gunships.
With the civilians under your care, your next priority should be to destroy the enemy's positions surrounding the town. A strong enough ground attack from behind will easily cripple any of the bases. For this, use of tech 3 assault bots is highly recommended. Experimentals work as well, but any land experimental will be picked off in the next stage by masses of strategic bombers. Prior to completion of this stage, it is recommended that you mass some gunships/bombers, and/or heavily fortify the choke point between the bases you just destroyed, and the bases from Stage One. The town you just saved will not come under any more attacks, making it a very good rally point for your forces. You may wish to leave a transport or two there to move your engineers to Fort Clarke in the final stage. In addition, make sure that your main base is ready for a major air assault.
Stage Three:
Once the final structure is razed, you'll be ordered to destroy Gari, the commander who has been harassing you thus far. At this point, she'll send swarms of bombers, fighters, air transports, and gunships at your main base. She will also order a Galactic Colossus to patrol the area your cleared in stage one, with some other various units patrols. All these units will head straight for the position you may have just fortified, and can cause some serious damage, as Gari also sends many Sniper Bots to inhabit the ridges first held by Order artillery (some point defenses in these positions can neutralize the threat, provided they're unable to be fired upon by units below the ridge). It is important to focus fire on the Colossus, before it overwhelms your defenses. Failing that, gunship patrols can clean out these units with ease. Other than the patrols, the pressure added to your defenses is minimal, but Naval units will start to appear in greater numbers, necessitating a navy of your own, or gunship/bomber patrols.
Now, back on the offensive. Gari's base is reasonably well defended, including a couple of Galactic Colossi, but your actual target is her ACU. So, all you need is a surgical strike on her position. Make sure to get radar coverage of her base, and then do a quick sweep with tech 3 Air Scouts, or Air Superiority Fighters. Now that you know where she is, you can take her out however you see fit. Sniper bots aren't particularly good for this, but the UEF or Cybran amphibious assault bots are extremely effective at running through her shields and focusing fire. Alternatively, provided you know her location, Tech 3 artillery installations are a great way of destroying her ACU, and they will be very useful in the final stage. Strategic Bombers work as well, but upwards of 12 should be used, as her air coverage is very good.
If you are playing as UEF, you have a number of options. You can simply build a Mavor and destroy the ACU, or if you prefer some action, you can build a couple of Atlantises and destroy her naval base, then use them to build a massive air force of Broadswords and Ambassadors and smash in. Do not use Fatboys as Gari has massive number of strategic bombers, but keep them for the final stage.
With Cybrans, you can build a Scathis at your position at Seabring and escort it with 20+ Bangers and bombard her base, or simply build a few Soul Rippers and crush her ACU.
Finally, if playing as Aeon, you can simply build two CZARs and go on a suicide run. If you prefer a head on fight, build some Colossuses and march into her base (Colossus is strong enough to take some strategic bombs without trouble).
With these strageties, you can defeat Gari without sacrificing a massive air or land force to smash through her defenses, which are already large enough.
Stage Four (Final):
With Gari eliminated, you may proceed to Fort Clarke. The Seraphim commander is hitting Fletcher's defenses pretty hard, and will reach his base within minutes. Using the transports you left at the civilian location, you can take your engineering units over to Fletcher's defenses and bolster them to some degree. It can also be helpful to build several factories in that area, which, with looped production queues, can help alleviate some of the pressure on your ally's forces.
The Seraphim commander is sending waves of Othuums, Ilshavohs and other Tech 2 units that quickly destroy his forward firebases. Send some Fatboys/Monkeylords/Colossuses to Fort Clarke and slowly push the waves back. The primary entrance to the Seraphim base is only lightly defended by a few Tech 2 point defenses. Push forward with your forces to destroy the Seraphim's firebases, which will significantly reduce the amount of forces you're facing. But be careful, the Seraphim have a Ythotha at the ready that can easily slice through anything land-based you throw at it. The CZAR/Soul Ripper will destroy it with ease, however if you have 3 or more Colossuses/Monkeylords it'll not be a threat for long either. As for UEF, a smart way would be to bombard it with Fatboys from afar while Flether's forces distracting the enemy.
Now it's time to teach the Seraphim not all humans are the weak and hopeless species they think we are. Send your army in and make his final moments the worst. Congratulations Commander, exit to debriefing.
Strategy/Walkthrough (Hard Mode)
Welcome to the Hard Mode section. Many of the tactics used here are unnecessary in normal mode, but crucial in hard mode. The order and timing of your actions are crucial in the beginning of each mission (and each stage) in order to survive the early assaults, and in most cases you'll need to capture enemy factions in order to make things easier. A general rule to remember in hard mode is that you must allow yourself to build up as much as possible before ending each stage in order to prepare for what's coming, thus you must be familiar with the flow of the mission.
This mission is one of the harder missions overall, especially at the beginning because of the intense attacks. It is recommended to hold out and avoid any expansion until T3 is reached.
Stage 1
Immediately at the start, move your ACU to under the shield, construct a land fctory, then upgrade your ACU to Tech 2. You want it to reach T2 as fast as humanly possible in order to hold out the shield for the coming assaults. Station your Percivals under the shield to counter ground assaults, and build 2 T1 engineers, one to repair the shield, the other assist the factory, then immediately upgrade the factory to T2. Very soon, just about when the ACU reaches T2 you'll be welcomed by a large gunship assault. Use the ACU to hold the shield. Let the gunships destroy those fabricators; you can rebuild them later. When your factory reaches T2, immediately build some mobile AAs to help take down those gunships, then get some T2 engineers and start building T2 flaks under the shield, then quickly upgrade your factory to T3. Those gunships will come constantly thus your ACU will be stuck holding the shield for now, and you might want to include in some T2 engineers if your shield can't withstand the attack even with the ACU holding it. Make sure you have enough T2 flaks (around 10 at least) to bring down those gunships quickly, you don't want them to overwhelm your shield.
When your factory reaches T3, get T3 engineers and start building SAMs next to those flaks. SAMs can destroy those gunships quickly enough before they weaken the shield. When you have a few SAMs in place, upgrade your ACU to T3. Start building T3 shields everywhere, make sure they cover each other but not too close that a bomber can hit both sides, and continue building those SAMs. You'll want a total of 20 at least along the beach before you can start to relax. Also get a Quantom Gate and get some sACUs, you'll want two at least for your base, one for your upcoming naval base, and one for the next stage. You can get a Strategic Missile Defense as well but a strategic strike is not likely. Strategic Missile Launcher is quite useless since the enemies will have defense buildings and you'll need a large strike to take them out, it's better to just use experimentals.
UEF: Make sure each sACU has the shield generator upgrade. Those 52k shields are crucial to protect your upcoming Mavor and Fatboys, since you can be sure that your Mavor will be a hot target. The rest are up to you but you'll certainly want the extra resources upgrade. As for the ACU, get the shield generator and resource upgrade as well.
Cybran: Make sure each sACU has rapid fabricator upgrade, but do not get the sealth/cloak upgrades for those that stays in your base, instead go for nano repair or AA upgrade. You rather have the strategic bombers hit your 30k HP sACUs than your much weaker buildings, and the upgrade drains your powers. The rest are up to you but you'll certainly want the extra resources upgrade. Do make sure one has the cloak upgrade. As for the ACU, get the cloak upgrade, then when you have enough resources get the microwave laser upgrade, just in case.
Aeon: Make sure each sACU has rapid fabricator upgrade and personal shield upgrade. Teleportation is a bit too slow for the next stage but have one sACU with it if you like. The rest are up to you but you'll certainly want the extra resources upgrade. As for the ACU, get heavy personal shield upgrade and enhance sensors in case your omni radar goes down.
Now, after your base is completely covered by shields, you can start looking into objectives. Get more resource buildings since the initial ones are not enough to build experimentals yet, and start building a T3 Heavy Artillery. This artillery will be your key to this stage, taking out the enemy buildings slowly while you concentrate on massing experimentals. Use the artillery to take out those T2 artilleries to complete the objective, then have it aim at defenses as well as air factories to slow down the gunship assaults, but remember to stop it when enemy has one or two factories remaining and put it in hold fire mode. You want as much time as possible before proceeding to next stage.
I'll split the guide here by faction:
UEF
Start building a Mavor (one is enough) and 3 Fatboys. Fatboys are slow and clumsy units so you dont want too many of them. Also build two Atlantises and have them destroy those submarines to complete the objective. Don't surface the Atlantises as the water is heavily guarded by petrolling Blazes and Auroras. Get an sACU to start building some SAMs further out the water, then only get two naval factories and quickly upgrade them to T3. Have two battleships ready to destroy those patrols and future naval assaults.
When the enemy is weakened beyond recognition, transport an sACU over to their base and capture one of their T3 engineers. After you captured one, transport it back to your base and have it build a Quantom Gate, then transport your sACU back. Get some Aeon sACUs and start massing Collosuses; they're much better at direct assaults than your weak Fatboys. Also start building a few CZARs to abuse their 15k air crash ability later on. Tempests are unnecessary since you have Atlantises.
Make sure you have at least 6 Collosuses, 4 CZARs, 2 Atlantises, 3 Fatboys and a Mavor before proceed to the next stage.
Cybran
Start massing Monkeylords and Soul Rippers. Scathis is useless since unlike in skirmish it only has the range of a T3 heavy artillery. Get an sACU to start building some SAMs further out the water, then only get two naval factories and quickly upgrade them to T3. Try not to build too far out or you'll attract the petrols. Have two battleships ready to destroy those patrols and future naval assaults. Get a Plan B ready and destroy those subs from afar to complete the obj (make sure not to get too close since Plan B is rather weak).
Make sure you've bombarded the Aeon bases beyond recognition before transporting your cloaked sACU. Unlike UEF, you need to be more careful since the enemy sACU, if still alive, has omni radar, thus if possible try to capture the engineer that isn't nearby the sACU, or you can bring two sACUs and use one to attract fire while the other perform the capture. After you done, transport the engineer and sACU back. Get Aeon Quantom Gate and get some Aeon sACUs. Build a Tempest to help with the naval defense. Also get Collosuses and CZARs, you want the collosuses to tank damage while your monkeylords wreck havoc, and CZAR is used for their 15k air crash ability as well as their speed since Soul Rippers are quite slow.
Make sure you have at least 3 Monkeylords, 6 Collosuses, 3 CZARs, a Tempest and 4 Soul Rippers before proceed to the next stage.
Aeon
Start massing Collosuses and CZARs. Unlike other factions you don't need to take the trouble to capture enemy tech. Move your CZARs out for some AA defenses while you start building two Tempests. Have them destroy the patrols and sub hunters (make sure the T2 artilleries are destroyed) to complete the objective, then build up your naval base. Have SAMs further out to engage air assaults, supported by Infinities.
Make sure you have at least 9 Collosuses, 4 CZARs and 2 Tempests before proceed to the next stage.
Stage 2
Station your land experimental forces to the left side before proceeding so that you can get to the outpost as soon as possible. You should have 3 Collosuses, then 3 Fatboys for UEF, 3 Monkeylords for Cybran and 3 additional Collosuses for Aeon. Bring an sACU with you as well, for Cybran it'll be the cloaked one. You can just use Collosuses but I find Fatboys and Monkeylords are more useful in destroying bases. When the map expands, immediately move those units along the left side then up to the outpost. Do not use air experimentals as the enemy has huge amounts of ASFs and Combat Fighters. Move to the outpost as soon as possible before it gets overwhelmed. If you move as soon as the map expands you should reach there in time. When you reach there, have the sACU build a shield generator and some SAMs, then his job is done. Have your T3 heavy artillery (and Mavor) start shelling those bases. Do not send experimentals into the base as after you destroy them, the next stage will begin with a huge air strike along that path to your base. Have your experimentals stationed at the outpost first. If you have Fatboys you can shell their bases from the outpost.
Make sure you're prepared before you begin the next stage. I recommend you read the next section first to know what to prepare.
Stage 3
Brace yourself for a huge air strike on your position, consisting of 15+ strategic bombers and huge amount of other air units, including transports that carrying Harbringers so make sure you do have a land experimental guarding your base. It can help to station Collosuses outside your shields so that they take the blunt of the damage. Strategic bombers will seek out your experimentals first, thus make sure your Mavor is protected by sACU's 52k shield, as only that is strong enough to hold against multiple strikes. If the Mavor do get destroyed, immediately move your sACU away so that it's wheckage dont get destroyed by stray bombs, saving you half of the mass and time. Enemies in hard mode do more damage than usual thus it only take 2 hits from those Shockers to destroy your Mavor, unlike the usual 3. Having CZARs and Soul Rippers around can help, but position the CZARs on the water; you dont want one of those to drop into your base should they get destroyed.
Enemy will start using naval units to assault your position, so make sure you have those battleships. Having submerged Atlantises and/or surfaced Tempests will help. Also there's that Collosus marching into your base, so have a CZAR and some Collosuses ready to welcome it. In fact it is a good idea to have Collosuses station at the north east of your island; they can help thin the naval fleet as well as amphibious assaults.
If you're UEF, you'll have the option to rescue the other outpost to the east. This is an exceeding hard operation to do and gain you nothing, but if you choose to do it anyway here's the strategy:
First, use a CZAR to clear the attacking navy. The civilian trucks will then be ready to move. They're safe until you move them to the center, so don't move them yet. Now, your biggest worry is the huge amount of sniper bots the enemy is sending along the center, and ONE HIT is enough to destroy one truck. Also, they'll be stray gunships and AA gunships around. Thus, you need to get your sACU out from the outpost to build a couple of SAMs along the path, and position your Fatboys and Collosuses at the center. The Fatboys can destroy those sniper bots before they get close enough to the path that your trucks are taking. Now you can move the trucks straight into the outpost, and be watchful of any gunships. You need 6 out of 10 survive in order to complete the objective.
T3 heavy artillery no longer has the range to bombard the enemy base, unless you have Aeon's Emissary but it is very slow to fire and enemy has lots of heavy shields. The base also has two strategic missile defenses so strategic strike is useless. The two Collosuses guarding the entrance make a land assault problematic.The UEF has it easiest with the Mavor simply bombarding the poor base to submission, however the easy alternative would be to send a CZAR and drop it on top of the poor ACU, since enemy never upgrade their ACU to T3, and only T3 ACU (or cybran's cloaked ACU since that upgrade provides HP) can survive a CZAR drop. If you're Cybran, you can also send your 4 Soul Rippers and rip the ACU to shreds, without suffering casualties.
Before you do any of the above though, make sure you have at least 3 Collosuses, 3 Fatboys (UEF), 4 Soul Rippers (Cybran), and another 3 Collosuses and a CZAR (Aeon) to prepare for the final stage.
Final Stage
Fort Clarke is being overwhelmed by the Seraphim and will need your help immediately. Move your army of experimentals there and start to move towards the Seraphim base, pushing the endless waves of units back. Collosuses are important here to take the blunt of the damage while others attack. You might want to bring along your sACU and build a T3 radar in the middle of the path to make things easier, especially for your Fatboys since they can shoot much further than they can see. There'll be minimal anti-air around before the main base so your Soul Rippers and CZAR can target practice on their forward bases.
In hard mode, there's be 2 Ythothas guarding the base, so make sure your Collosuses have enough HP to fight them. If you're UEF, the Mavor can help destroying most of the base before your forces even reach the entrance, and if you're lucky you might even get the ACU as well, since you only need one or two hits for it to engulf in explosion.
You'll win the mission after the two Ythothas and the ACU is history.